I’m sorry for the belated post. This was supposed to go up on Friday night, but literally as I was writing my condition changed dramatically… It turns out that the “1 Thing” I did this week was contract NOROVIRUS and it’s been awful. I am just crawling out of the bathroom and getting back to normal today, so this will be my post for this week AND last week and I should get back to normal the first week of February. This illness was no picnic and I wouldn’t wish it on my worst enemy!
Here’s what my former, healthier self was able to accomplished before falling victim to this dreadful illness..
The Challenge: To decorate a bare wall of my son’s nursery in an aviation theme.
My Inspiration: I’ve already made an airplane shelf and airport code posters, but I needed another decor element to fill a bare wall above my expected son’s crib. I surfed around Pinterest and I decided to combine two different crafty things to complete the wall. First, I’d wrap the letters of his name with colored yarn and hang them on the wall. Second, I’d apply airplane decals that I bought off of Etsy.
What I Need:
- “Paper Mache” letters. Basically, they are plain brown cardboard 3D letters.
- Two different colored yarns. I chose Sugar and Cream brand blue/white & green/white yarn because it was heavily discounted.
- Craft glue
- Scissors
- Airplane decals + a small piece of plastic that reminded me of a hotel room key
- Scotch tape
- Level
- Tape Measure
Who is Helping Me: I ordered the decals off of Etsy and they were pretty affordable and easy for even a dunce like me to apply. I was seriously worried that I would end up making them a wrinkly mess, but the directions they included were very thorough.
Who is NOT Helping Me: My own determination to not seek expert consultation on how to wrap the letters. I have to admit, I generally glanced over how some craft bloggers said to wrap the letters with yarn and then I promptly did the opposite and did it my own way. My way did indeed work, but there is always the chance that their way is a lot easier.
Also, Norovirus.
How I Did It:
The Letters:
(For this explanation, I will describe how I wrapped the letter E because it was the absolute easiest letter to wrap. O wasn’t great, W was awful, N was super hard. Like a dum dum who forgot she was doing this for a blog, I didn’t take a picture of the process so my written explanation may be vague and unhelpful)
I made a graphic to help explain my made-up terminology.

- I ran a splooge (technical term, see above graphic) of glue along the top of the the letter E on its outer edge and began wrapping up and down around the top arm of the letter E.
- Once the arm was full of perfectly wrapped vertical lines of yarn, I began wrapping up and down around the height of the letter E and then finished the other two arms so that they were covered with yarn vertically.
- Once the letter was completely covered up and down, I splooged some more glue along the backside of the letter, anchored my yarn and began wrapping “across”each arm to make horizontal lines.
- I adhered the loose, finished strand of yarn to the back of the letter with glue so it wouldn’t unravel and it couldn’t be seen from the front.
…TL;DR: I made sure the entire letter was covered with yarn evenly and it looked nice.

I repeated this general process with O, W, and N. Each letter presented it’s own difficulty because none of the letters left (“O”,”W”, “N) have perfectly straight lines like the letter E. It may have been the early stages of Norovirus beginning to weaken my body and mind, but in the middle of wrapping the letter W, I briefly considered naming my son “TEEL” solely to spare myself from having to wrap any more letters with wonky lines. But after repeating “Teel Leffel” to myself several times, I decided to just persevere with our original chosen name.*
*After finishing all the letters, I realized the name “LEE” would have been a much more realistic alternative name than “TEEL” but when you consider my impending illness, you can forgive such an oversight.
When I finished, I hung the letters with really small nails so you can barely see how they are hung. I used a level to make sure they were level and I used a tape measure to make sure they were spaced evenly and centered on the wall.
The Decals:
- I ordered the decals off of Etsy.
- I cut them out of the large sheet of decals so that I had 4 separate airplane decals to hang.
- I laid them flat on the ground and ran over them heavily with the edge of a credit card looking item they enclosed to “activate” the adhesive.
- I taped the decals where I wanted them and followed the rest of the instructions on how to delicately apply them.

Taped up letters before application.
Pretty easy!
Here’s the finished product:
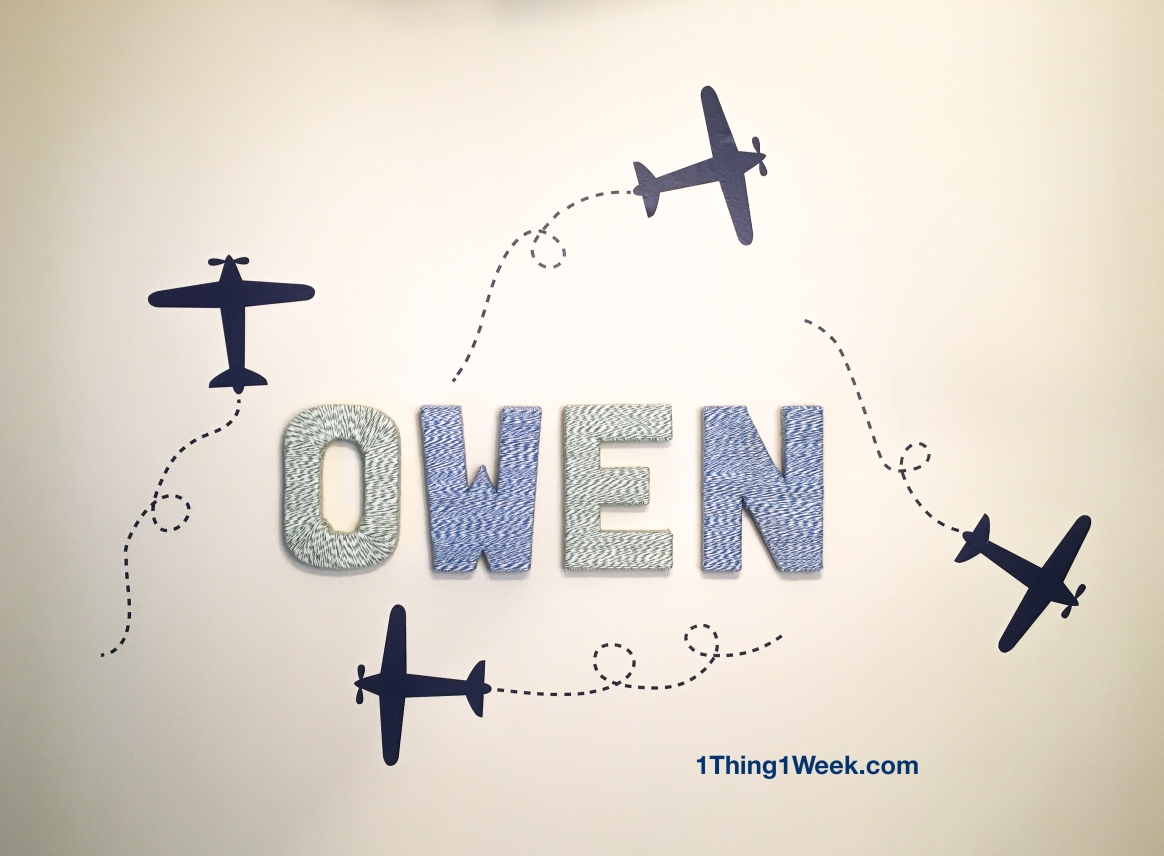
Would I do It Again: If I had to wrap letters for a friend who named their baby “Teel”, yes. If I were doing it again for fun for a baby named “Wowza” or “Nanzoo”, probably not. The letters are time consuming and tedious work, so I wouldn’t recommend the project for someone wanting to do a quick craft. I did one letter a day for 4 days and that’s about all I could handle. It takes a lot of focus and precision so other than simultaneously listening to your reality TV show of choice in the background, you can’t really multi-task with this craft.
I was really pleased with the decals and I would definitely tackle another decal project in the future.
All in all, I was happy with the way things turned out in the end and I am proud of myself for not haphazardly changing my son’s name to “Teel”.


Your readers could also consider naming their babies TIE, FITE, HIL, TIL, FEH, and so on, if they are looking for other names that will give this craft maximum ease. It’s 2017: probably at least half of those have already been used by somebody. Love this project and the wall looks great!
LikeLike